Setup Manual
Set Up MyODS From Install To Go-Live
A starter manual for clubs getting the system online, connecting Jonas, dialing in settings, and launching service.
What We Need And What You Need
Before step 1 starts, gather the basic install and information so the setup moves quickly and nobody has to stop mid-install to track it down.
What TTA Needs
Public WAN IP
We need the club's public WAN IP so orders coming from the Jonas application server can be whitelisted.
Backup circuit information
If the club has a backup internet circuit, we need that information too so orders will still be allowed if the main circuit goes down.
Screen information
Please provide the number of screens, what kitchens or areas they go in, and the station names for each screen such as Expo, Prep, Saute, Grill, Salad, or Dessert.
What The Club Needs
MyODS URL
The club will need the MyODS URL that each screen should open for login and daily use.
Account credentials
The club will need the login credentials for the screen accounts as well as any report-user accounts that managers will use.
Jonas routing IP and port
The club will need the routing IP and port details required for the Jonas setup so Jonas can send orders to MyODS correctly.
Physical Install
Start with the physical install. The goal of this step is to get each screen mounted in the correct place, powered properly, and ready for day-to-day use.
Mount each unit at the station it belongs to
Place each screen where the team will actually work from it, such as grill, pantry, expo, or bar. Make sure the mounting angle and reach are comfortable during service.
Power up and verify the device stays on
Confirm the unit boots cleanly, the display looks correct, and all cables are secure. These units need to be powered by the power cable, not POE. If you are using external adapters or management hardware, check those at the same time.
Checkpoint Before Moving On
Network Setup
Once the screens are physically in place, move into the network side. The goal of this step is to make sure each screen can reach MyODS reliably and the club has provided the WAN information needed for whitelisting Jonas traffic.
Establish internet connectivity
Each screen must be able to reach out to the internet before it can receive tickets. Confirm the browser loads your MyODS site and that the connection is stable enough to stay live during service.
Static IP is optional
A static IP is not required for the screens. The club can assign one if they want to, but MyODS does not require it.
Provide WAN and backup circuit information
We also need the club's public WAN address so we can whitelist orders coming from the Jonas application server. Please also provide any backup circuit IP information so if the club's main internet goes down and traffic fails over, orders will still be allowed.
A quick way to get the WAN address is to log into the Jonas application server and visit IPChicken, or search Google for "what's my IP".
Checkpoint Before Moving On
Technical Overview
MyODS Pre-Planning And Network Requirements
Important Direction Note
All communication is one way from the club's Jonas Server to the MyODS application server. The club does not need to allow any inbound traffic to their Jonas Server for MyODS to function.
WAN Address Needed
TTA needs the club's public WAN address so we can whitelist orders coming from the Jonas application server. Please also provide any backup circuit IP information so if the club's main internet goes down and traffic fails over, orders will still be allowed. A quick way to get this is to log into the Jonas application server and visit IPChicken, or search Google for "what's my IP".
Default Ports, Hosts, And Firewall Information
| Destination | Port(s) | Protocol | Description |
|---|---|---|---|
| AnyDesk | 80, 443, 6568, 50001, 50002, 50003 | TCP | AnyDesk remote control feature for devices (WAN). This communication is optional but may limit support capabilities. Whitelist *.net.anydesk.com for firewalls or other traffic monitoring software. |
| TeamViewer QuickSupport | 5938, 80, 443 | TCP, UDP | TeamViewer remote control feature for devices (WAN). This communication is optional but may limit support capabilities. Whitelist *.teamviewer.com for firewalls or other traffic monitoring software. |
| TeamViewer Host | 5938, 80, 443 | TCP, UDP | TeamViewer remote control feature for devices (WAN). This communication is optional but may limit support capabilities. Whitelist *.teamviewer.com for firewalls or other traffic monitoring software. |
| *.myods.club | * | TCP, UDP | Primary application service endpoint used by MyODS clients during normal operation. Client devices establish outbound connections to this domain to retrieve configuration data, order information, and real-time service updates. All connections are outbound-only and initiated by client devices. No inbound firewall rules are required. |
| auth.myods.club | 443 | TCP | Secure authentication and authorization endpoint for MyODS. Client devices connect over HTTPS to perform user authentication, token issuance, and session validation prior to accessing application services. |
Go To The URL And Login With The Provided Accounts
Once the hardware is online, use the club's MyODS web address and the accounts provided for the install. This confirms the site is reachable and each screen can be opened under the right login.
Enter the club's MyODS URL in the browser on the installed unit. Bookmark the page for easier recovery later.
Use the designated account for each screen. Do not reuse the same account on multiple screens, as each account can only be assigned to one unit.
After logging in, stations are grouped by Site, Location, and Sublocation. Verify that you select the correct station for the screen you are setting up.
Checkpoint Before Moving On
Route Items In Jonas To The Correct Screens
After the screens can log in, choose how the club wants orders displayed in MyODS. There are two valid setups in Jonas, and either one can be correct depending on how the kitchen wants to work.
Option 1: Show the full order on every screen
In this setup, every screen gets the complete order. This works well when stations need to see the whole ticket so they can time off each other during service.
Option 2: Send certain items to certain screens
In this setup, each screen only gets the items for that station. For example, a salad station may only receive salads while grill only receives grill items.
Test the setup the club chooses
Run a few controlled test tickets through Jonas and confirm the screens behave the way the club expects. This is the fastest way to catch routing issues before live business.
Jonas Routing Reference
Jonas JCM
Expand this card for a helpful reference on adding the KDS in JCM so it is available later when the club configures Jonas routing. Use the button below for Jonas reference material on routing items to the KDS screens.
Open JCM ReferencePro tip
Follow the steps below to create the KDS in Jonas. This must be completed before routing so the KDS appears as an available option.
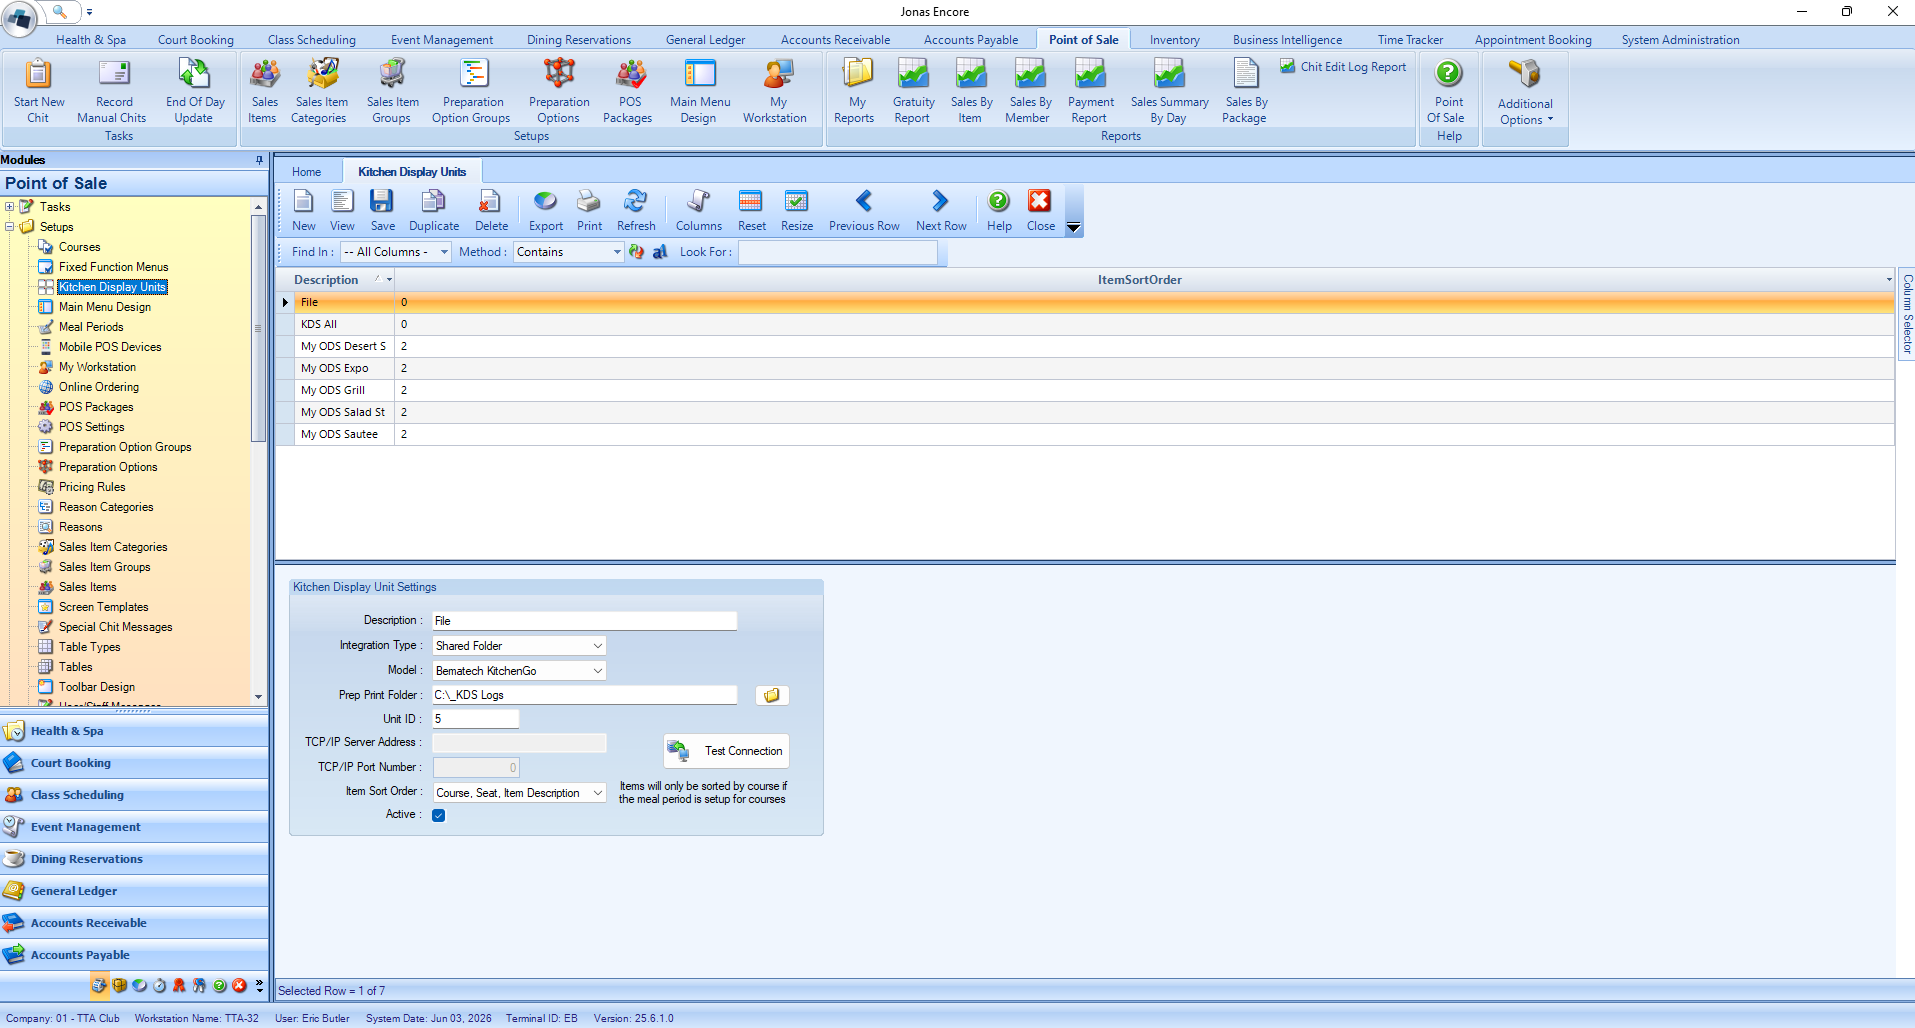
Step 1: Open Kitchen Display Units
In JCM, go to Point of Sale System > Chit Processing > System Administration > Kitchen Display Units.
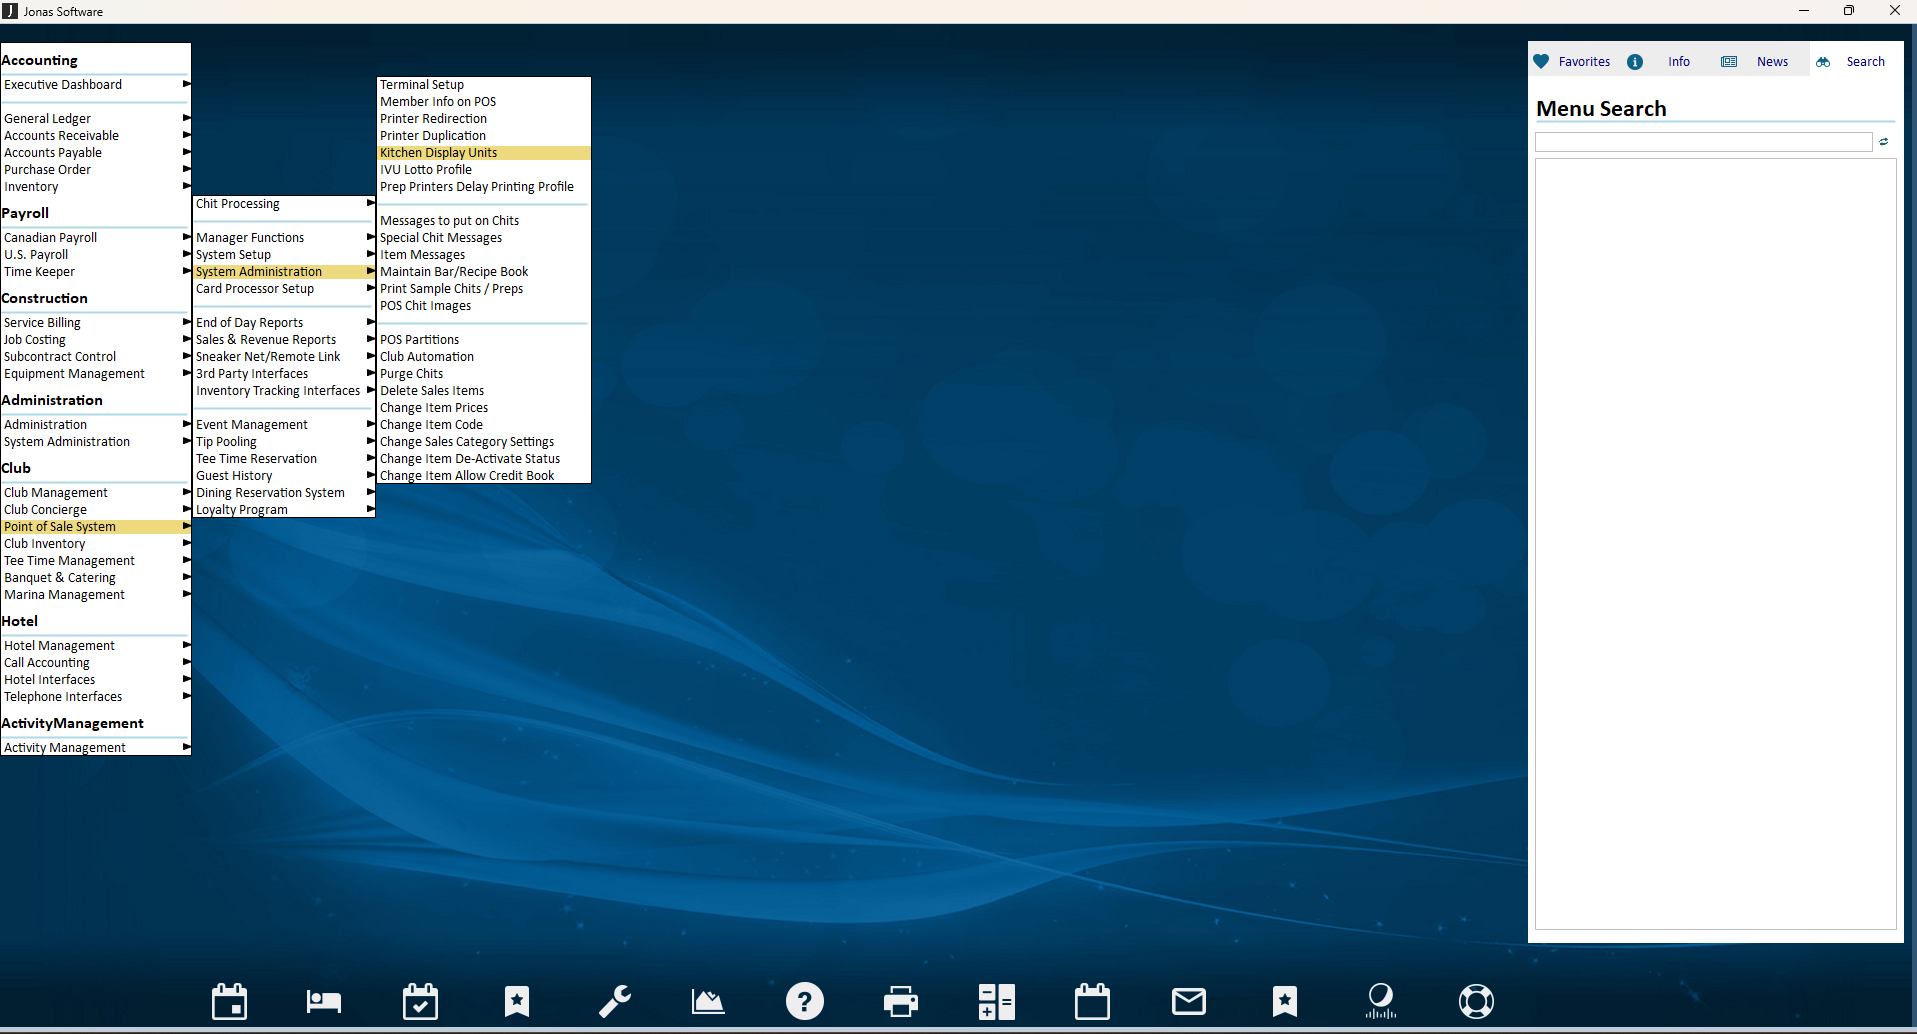
Step 2: Add a new display unit
From the display unit list, choose Add a New Display Unit so you can create the new KDS entry.
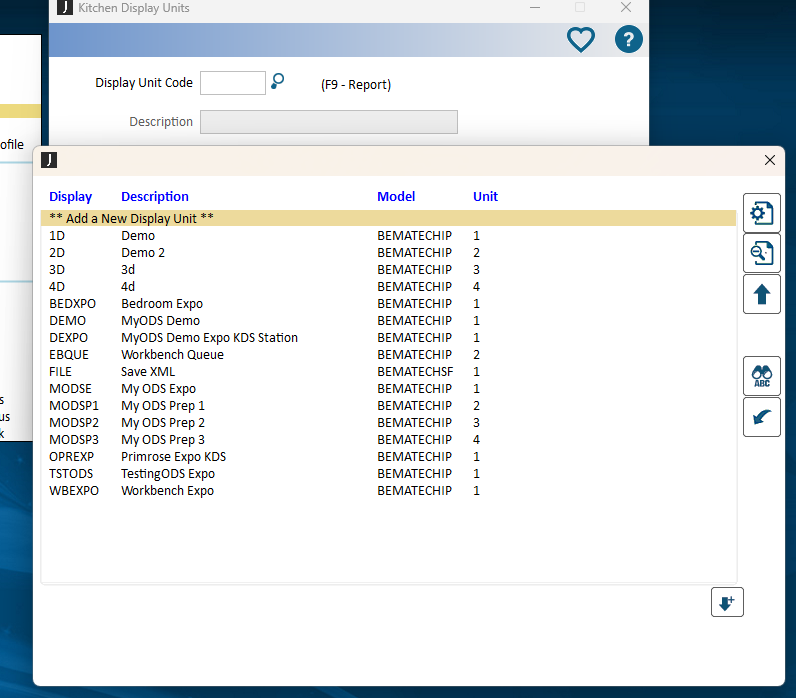
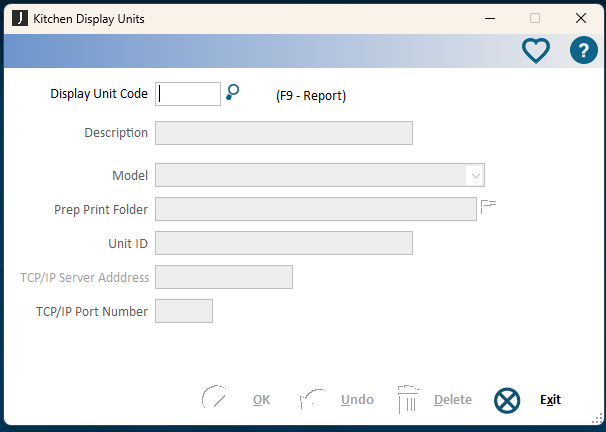
Step 3: Fill in the KDS details
Fill in the KDS fields using the screen information gathered during prep and testing.
Display unit code: A short code the club will see later when assigning the KDS to an item or category in Jonas.
Description: A longer name the club can use to easily identify the KDS.
Model: Always choose the option that ends in TCP/IP. Do not use a different model option.
Prep print folder: Leave this blank. It does not need to be filled in or selected.
Unit ID: The screen ID provided by TTA during the prep phase.
TCP/IP server address: Provided by TTA during testing.
TCP/IP port number: Also provided by TTA during testing.
Routing Tip
Adding the KDS here makes it available as a routing destination in Jonas. Assigning that KDS to categories, items, or other routing structures is a separate Jonas configuration step and is not covered in this KDS creation reference. Please use the referece materials below for additional information.
Jonas Routing Reference
Jonas Encore
Expand this card for a helpful reference on adding the KDS in Encore so it is available later when the club configures Jonas routing. Use the button below for Jonas reference material on routing items to the KDS screens.
Open Encore ReferencePro tip
Follow the steps below to create the KDS in Jonas. This must be completed before routing so the KDS appears as an available option.
Step 1: Open Kitchen Display Units in Encore
There are two common ways to reach the same Kitchen Display Units screen in Encore. The club can use whichever path is easier for them.
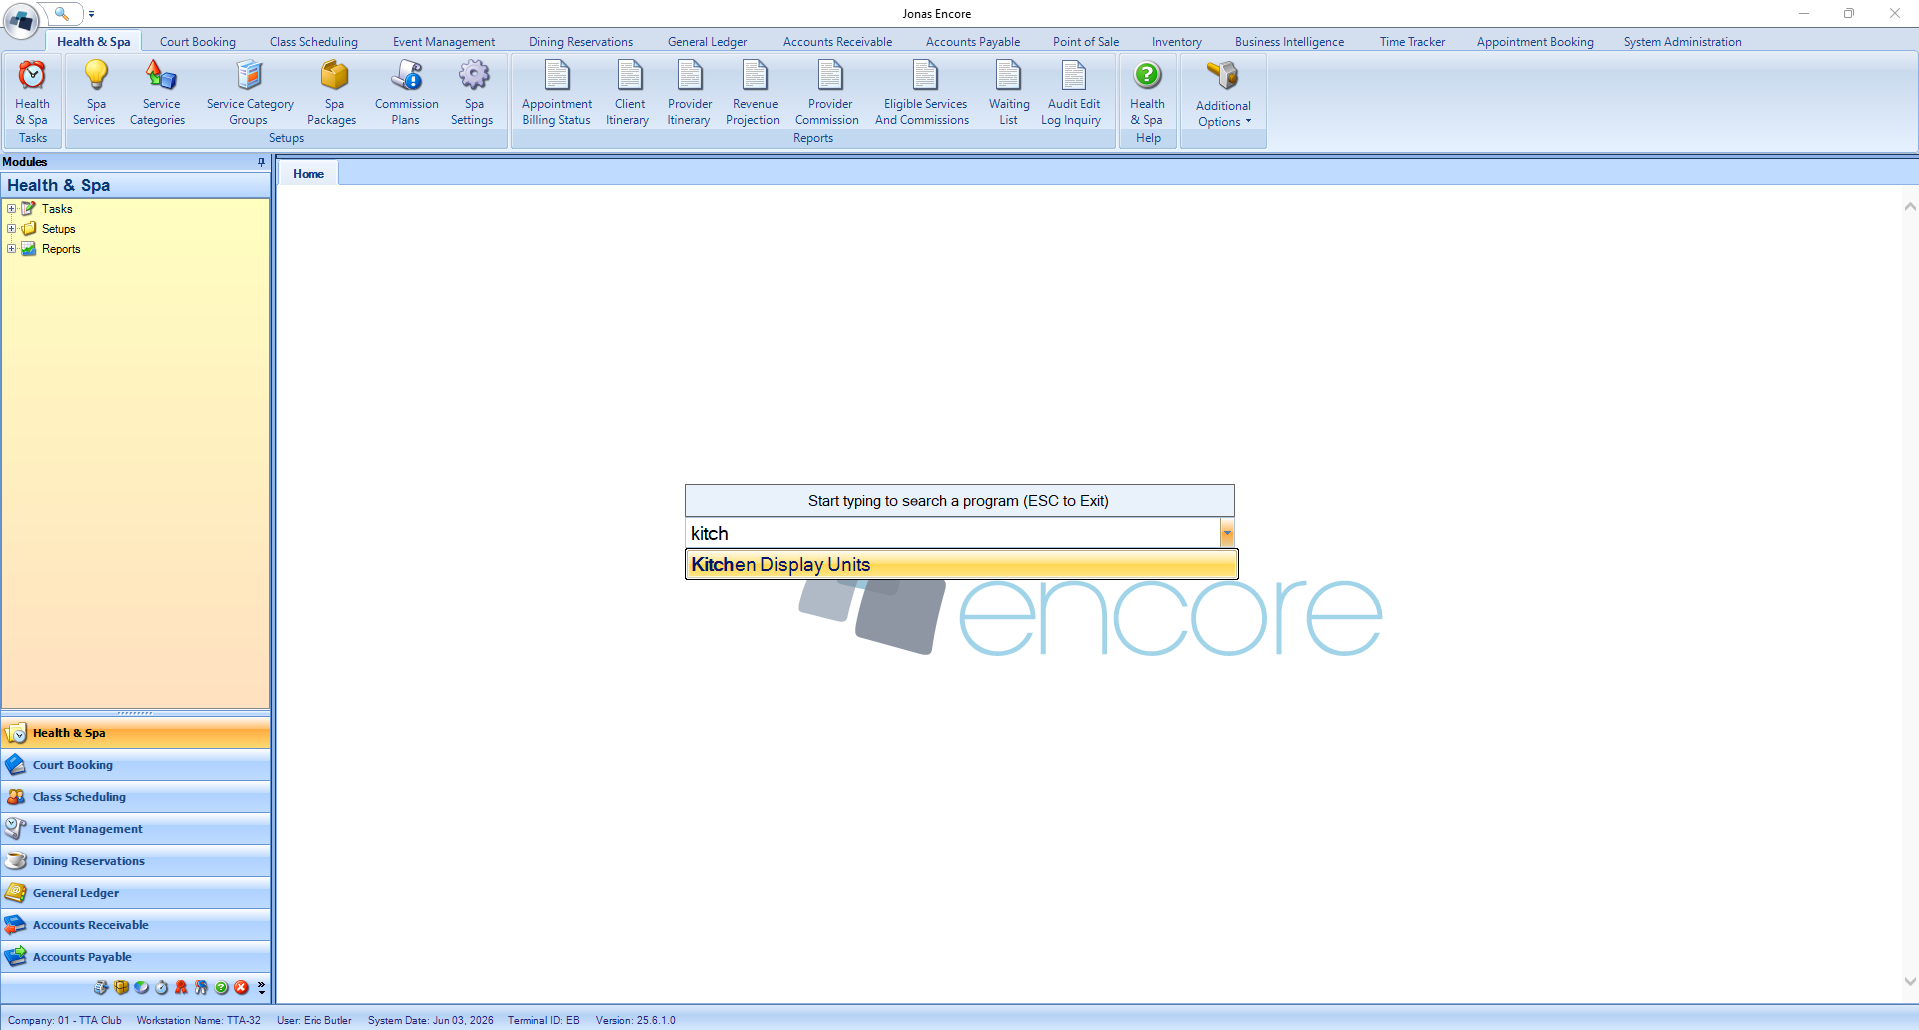
Option 1: Use the Encore search field and type in Kitchen Display Units, then open it from the result list.
Option 2: Navigate through Point of Sale > Setups > Kitchen Display Units.
Step 2: Open or create the KDS entry
In the Kitchen Display Units screen, open the unit you want to edit or create the new KDS entry for the station you are setting up.
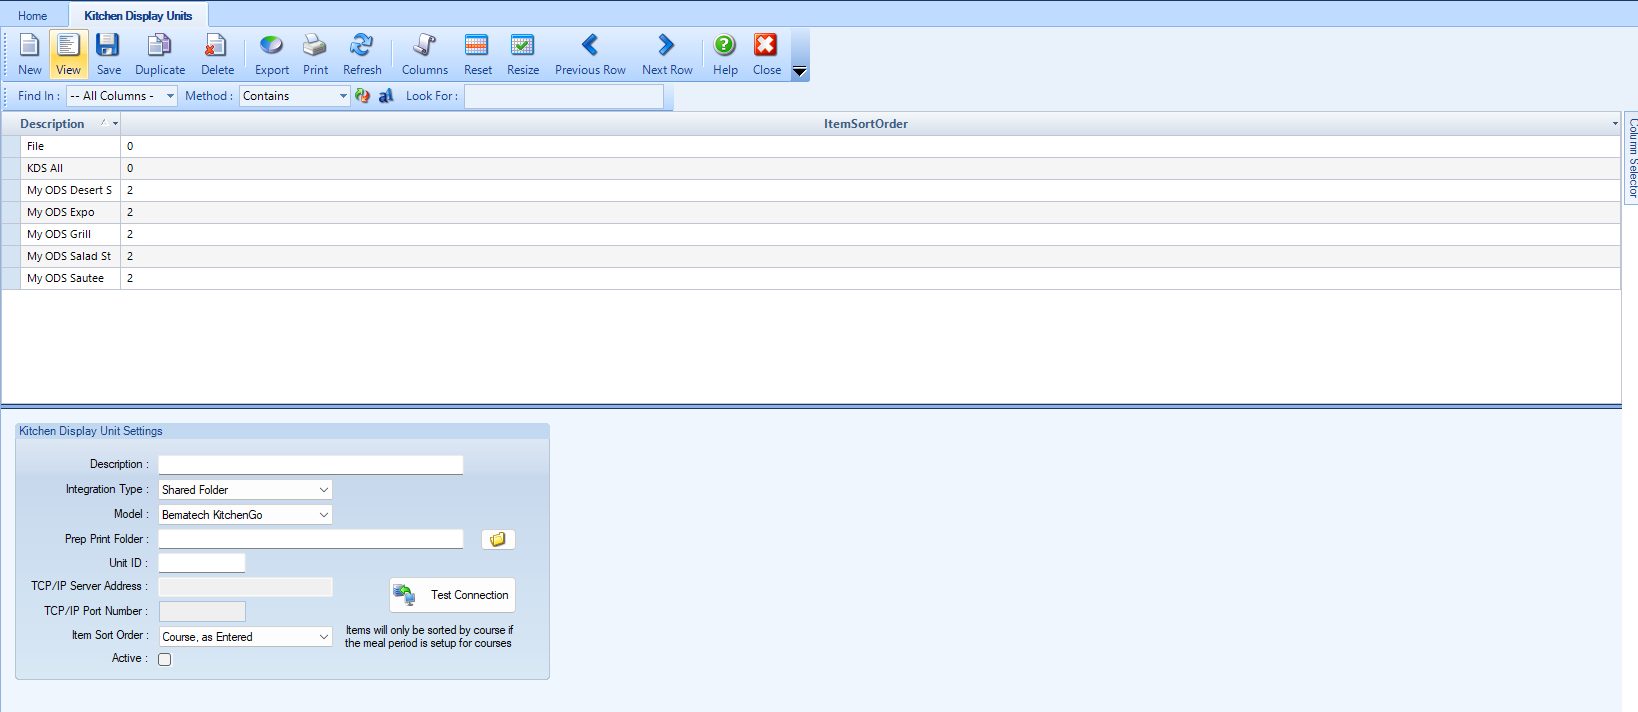
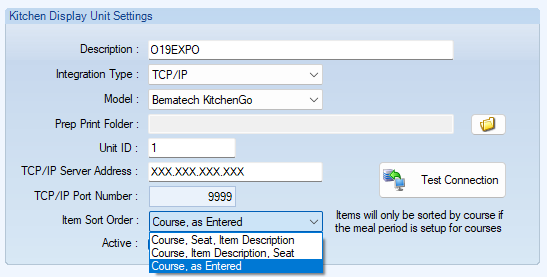
Step 3: Set the KDS connection details
Fill in the KDS fields using the screen information gathered during prep and testing, then confirm the item sort order the club wants before saving.
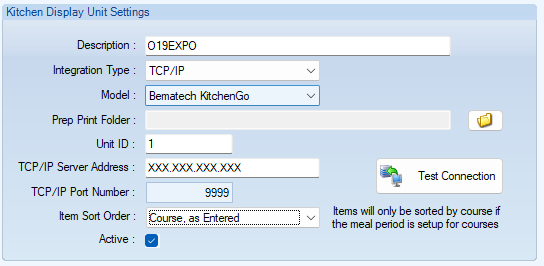
Description: A longer name the club can use to easily identify the KDS.
Integration type: Set this to TCP/IP.
Model: Always choose the Bematech KitchenGo model option shown for Encore. Do not use a different model type.
Prep print folder: Leave this blank. It does not need to be filled in or selected.
Unit ID: The screen ID provided by TTA during the prep phase.
TCP/IP server address: Provided by TTA during testing.
TCP/IP port number: Also provided by TTA during testing.
Item sort order: Choose the order the club wants items to appear on the KDS.
Routing Tip
In Encore, adding the KDS here makes it available as an option for later Jonas routing setup, including sales-group assignment if the club uses that structure. That assignment work is still separate Jonas configuration and is not part of this KDS creation reference.
Checkpoint Before Moving On
Configure Settings
Once tickets are landing on the correct screens, tune the system so it behaves the way your club wants it to. This includes display behavior, timing, coursing, sounds, and workflow preferences. After changing settings, refresh the screen so the new settings activate.
Start with the settings that change daily usability the most: ticket appearance, timing, item grouping, coursing behavior, sound alerts, and any screen-specific workflow options.
Keep the first pass simple. Get the screens readable and functional first, then fine tune once the team has worked a real shift on the system.
After making setting changes, refresh the screen so the new settings take effect before you continue testing.
Use the dedicated Settings Manual when you want a line-by-line explanation of each option.
Helpful Next Step
Open The Full Settings Reference
The settings page already breaks down each tab and setting in detail, so this setup manual can stay focused on the install flow.
Go To Settings ManualCheckpoint Before Moving On
Use The System
After install, login, routing, and settings are done, the last step is go-live. Run a few real-world scenarios, confirm the team understands the screens, and then move into normal operation.
Run a final test order
Verify routing, timing, and visibility one more time with a realistic ticket before you declare the install complete.
Walk the team through the workflow
Show staff how to read tickets, mark items, bump tickets, and recover from simple issues like reconnecting or reopening a station.
Start simple on day one
Avoid over-configuring before service. A clean working setup is better than a perfect but untested one.
Adjust after live feedback
Once the club has real usage, refine routing and settings based on how the line actually moves during service.
Recommended Handoff
When setup is complete, point the club to the other manuals so staff, managers, and administrators know where to go for daily use, reporting, and detailed settings help.
Support Reminder
Make sure everyone knows TTA's contact information for support: help@tta.club and (813) 249-0303.